Tools
Tools in Spine are found in the main toolbar:

Right clicking anywhere in the viewport will toggle between the current tool and the last selected tool. This makes using multiple tools more efficient as it is much faster than clicking the toolbar buttons. Otherwise there are default hotkeys for switching tools:
|
|
Selection
Instead of a dedicated selection tool, Spine uses a smart selection system. Selecting an item in the viewport is done by simply clicking the item you want to select. With most tools, starting a drag on an unselected item will both select that item and begin manipulating it.
To select multiple items, hold ctrl (cmd on Mac) and click each item. To box select, hold ctrl (cmd on Mac) and drag. When nothing is selected, box selection can be done by dragging in empty space. Dragging with the middle mouse button will always box select, without needing to start in empty space.
Deselect
Clearing the selection is often unnecessary but can be done by pressing spacebar, escape, or by double clicking anywhere in the viewport. It can be useful to deselect, then drag in an empty area to box select.
Selection history
It is very common to need to select the same objects that you recently had selected. Finding and selecting them again is very slow, so Spine remembers your selections and you can navigate through them using page down and page up. This greatly reduces tedious hunting in the viewport and scrolling in the tree view.
Selection groups
Selections can be stored by pressing ctrl+1 (cmd+1 on Mac), where 1 can be any of the number keys, 0-9. The selection can later be recalled by pressing the number key without holding ctrl (or cmd). Selection groups can save a lot of time when the same selections are needed often. For example, for a humanoid skeleton selection groups could be stored for the torso, head, arms and legs.
Transform tools
The Rotate, Translate, Scale, and Shear tools each work similarly. The selected item is adjusted by dragging the mouse. The drag should start in empty space or on the item itself. If the drag starts on a different item, that item will be selected and adjusted.
Making adjustments by dragging in empty space reduces fatigue from using the mouse to animate for long hours. Adjustments are quick and precise, without requiring precise interaction with small control handles.
Numeric entry
Each transform tool has a numeric display whose values depend on the selected axes. New values can be typed and will take effect when enter or tab is pressed.
![]()
A quick way to key a bone's full rotation in animate mode is to set the axis to Local, key the initial position, then move to the frame where the rotation should end and type +360 or +-360.
Relative values can be entered by starting the number with +, for example +123. Relative negative values must also start with a plus, for example +-123. Multiplications and divisions can be performed by starting the number respectively with * or /, for example *2.
The mouse can be used to change the value by scrolling the mouse wheel while over the number or by dragging up or down. Hold shift while using the mouse wheel or dragging to adjust the value in smaller increments.
The arrow keys can be used to change the value for the selected transform tool. Hold shift while using the arrow keys to adjust the value in smaller increments.
Axes
The Local, Parent, and World axes determine the numeric values shown for rotation, translation, and scale, as well as the direction of the axes shown in the viewport. This gives more control over how items are transformed.

Rotation, scale, and shear values are stored using Local axes. Translation values are stored using Parent axes. When other axes are chosen, the stored values are converted to and from the chosen axes. How the chosen axes affects the numeric values shown for each transform tool is explained below.
Rotate tool
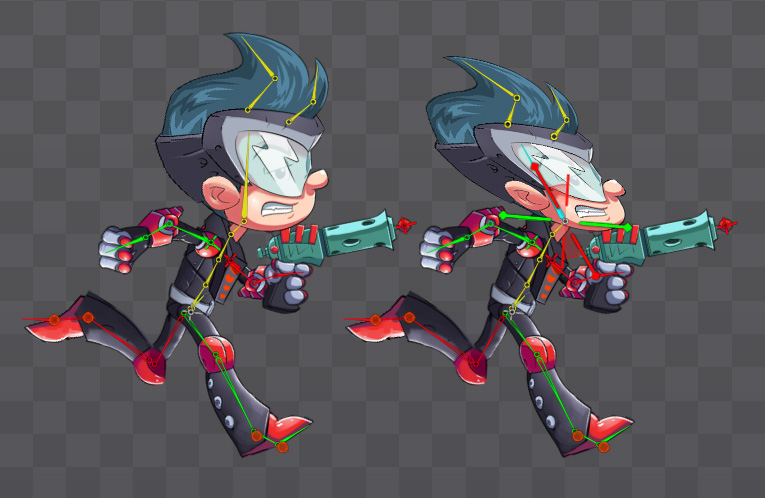
The pivot point for rotating a bone is always the bone's origin. shift can be held while dragging to constrain rotation to 15 degree increments.
Axes:
Local: The value is the counterclockwise rotation relative to the item's parent, where 0 is pointing the same direction as the parent's X axis.Parent: Rotation is not affected by choosingParentaxes. Local rotation is shown.World: The value is the counterclockwise world rotation, where 0 is to the right, 90 is up, 180 is left, and 270 is down.
For bones, rotation in setup mode is limited to 0-360 degrees, indicating which direction the bone is pointing. In animate mode, local rotation can be outside that range, indicating both the direction of rotation and the number of complete rotations the bone will make. However, be wary that when World axes are selected, the rotation is limited to 0-360 degrees even in animate mode because it indicates which direction the bone is pointing in world coordinates. In that case the World axes button is highlighted orange as a reminder while typing a rotation value.
Translate tool
The X or Y handles on the Translate tool icon in the viewport can be dragged to restrict translation to a single axis.
Axes:
Local: The value is the distance to the item's parent using the item's local axes. The X axis points in the direction of the item's rotation.Parent: The value is also the distance to the item's parent, but using the parent's local axes. The X axis points in the direction of the parent's rotation.World: The value is the distance to the world origin.
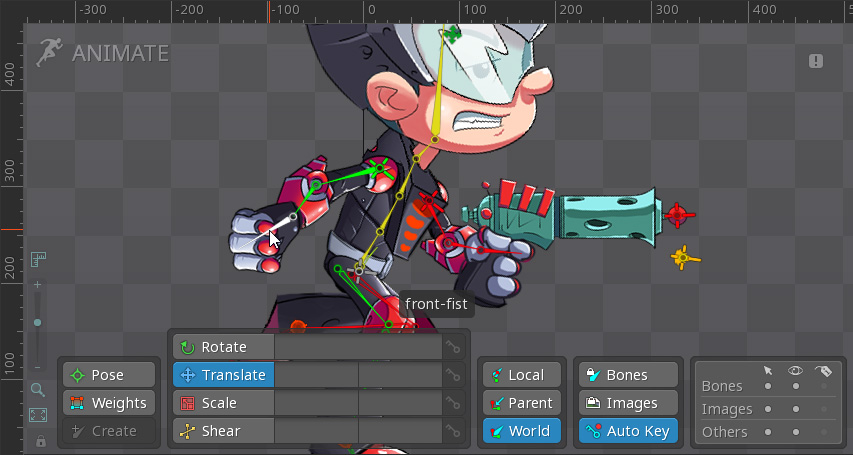
Translating multiple bones by Local or Parent axes can be useful to move the bones in different directions the same amount. For example, to make both arms longer.
![]()
Here the lower arms have been translated along the parent's X axis by choosing Parent axes and then dragging the red X axis arrow on the Translate tool icon.
Scale tool
The X or Y handles on the Scale tool icon in the viewport can be dragged to restrict scaling to a single axis.
Axes:
Local: The value is the local scale to apply. The X axis points in the direction of the item's rotation.Parent: Scale is not affected by choosingParentaxes. Local scale is shown.World: The value is the combined scale of the item and all parent bones.
Scale is always applied using the item's local axes. The X axis (red) for scaling always points in the direction of the item's rotation.
The world scale cannot be edited directly. When the scale text boxes are focused, the values change to local and the value entered is used as local scale. In that case the Local axes button is highlighted orange as a reminder while typing a scale value.
Flipping is achieved by scaling one or both axes to -1.
Scale examples
Here spineboy's torso has been scaled down. The child bones of the torso inherit the scale from their parent and are also scaled down.
Here spineboy's torso has been scaled on the Y axis (green) to -1. That causes the Y axis to point in the opposite direction, without changing its size.
Here spineboy's torso has been scaled down, but only on the Y axis. When the X and Y scales have different values, it is called nonuniform scale. The child bones inherit the scale as before, but since the parent scale squashes them in the parent's Y direction, the child bones are sheared (skewed).
The Y axis is normally 90 degrees to the X axis. Here spineboy's arm is selected to show that the torso bone's scale has sheared the child arm bone, changing the angle between the X and Y axes.
Shear tool
Shear can be applied to an entire hierarchy of bones and is easier to apply than using deform keys or mesh weights. Also, shear is available in Spine Essential while meshes and weights require Spine Professional.
The X or Y handles on the Shear tool icon in the viewport can be dragged to adjust the angle between X and Y axes, causing attachments to be skewed.
Similar to scaling, shearing causes child bones and attachments to deform and is most commonly used in small amounts for organic squash and stretch in animations (for example, see spineboy's head). The deformation from shearing differs from scaling and can help prevent animations from looking rigid or robotic.
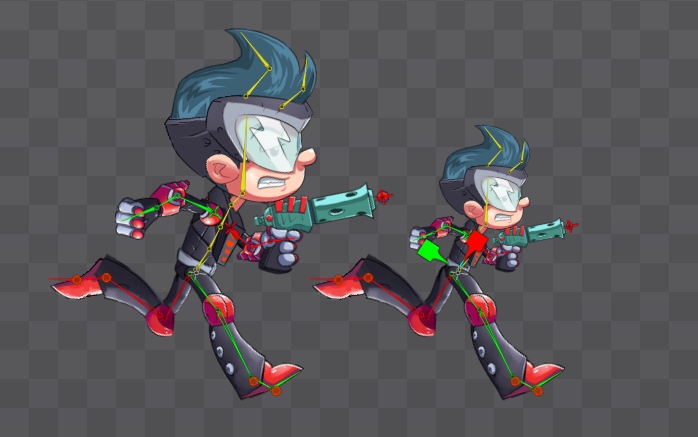
Pose tool
The Pose tool can adjust both bone translation and rotation, allowing for quick bone manipulation without switching tools. While most other tools work by selecting a bone, then dragging in empty space to manipulate the bone, the Pose tool requires dragging handles on the bones.
To translate a bone, move the mouse over the bone's origin so a translate icon appears, then drag. When multiple bones are selected, only the dragged bone is translated.
To rotate a bone, move the mouse anywhere over the bone, except over its origin, so a target icon appears at the tip of the bone, then drag. The bone will rotate to point at the target. When multiple bones are selected, IK (inverse kinematics) is used to rotate all the bones until the tip of the last bone reaches the target.
Unlike other tools, clicking in empty space deselects and dragging in empty space does box selection, making it easy to select multiple bones.
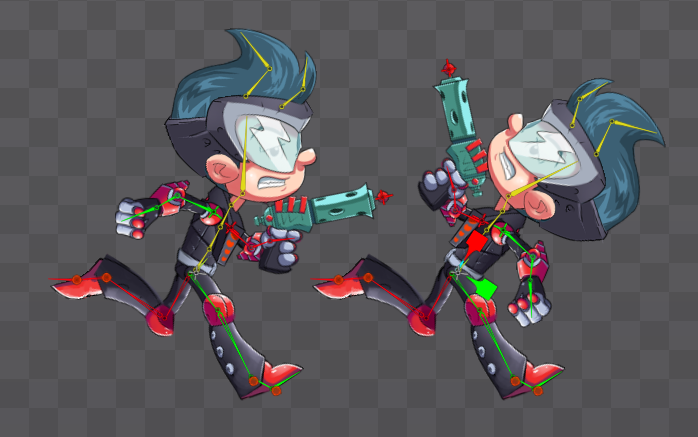
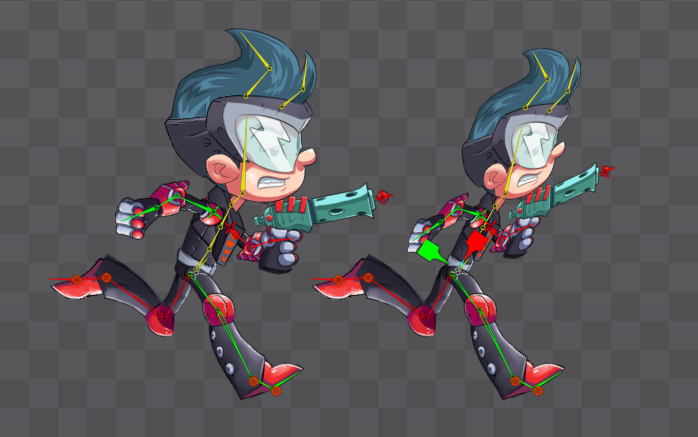
Pose examples
Here the tail is being adjusted by the Pose tool.
Multiple sets of bones that do not have a common parent can be adjusted without losing the selection.

Here both arms and legs are selected. Any selected bone can be dragged to adjust only that limb, without losing the selection of the bones that aren't being adjusted.
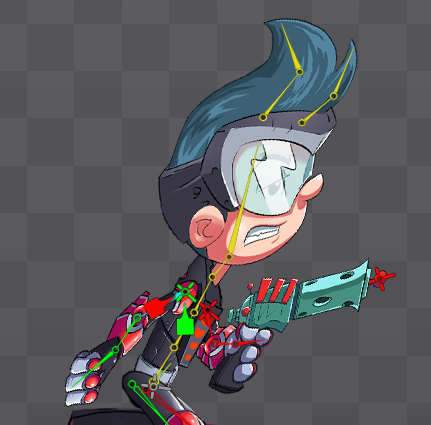
Bone length tool
In setup mode and when the Rotate, Translate, or Scale tool is active, placing the mouse over the tip of a selected bone allows the bone's length to be adjusted. Multiple bones can be adjusted at the same time. The bone length can also be adjusted numerically using the bone's length property.
Here the length of the sword bone is being adjusted.
If the bone length tool appears when trying to select a different bone, deselect first.
Hold alt (option on Mac) while dragging to move the child bones the same amount.
Other tools
Weights tool
The Weights tool is used in combination with the weights view to set the influence bones have on a mesh's vertices. See the weights view for more information.
Create tool
Mesh wireframe can be enabled so mesh vertices can be seen when creating bones.
The Create tool creates new bones, which can only be done in setup mode. Before creating a new bone, first select the bone that will be the parent. Next, either click to create a zero length bone or drag to create a bone and set its length.

When choosing where to create bones, keep in mind that bones pivot around their origin when rotated.
In Spine there are no limitations for where a bone is created. Child bones are not required to have their origin at the tip of the parent bone.
To easily fix a bone that is not in the correct position, select the bone, then hold alt (option on Mac) and drag or click to recreate the bone. Any child bones or attachments will be unaffected.
After a bone is created, the new bone is selected. To create a sibling of the new bone, the parent bone must be selected again. If shift is held when creating a bone, the new bone is not selected, making it easier to add multiple sibling bones.
Create workflow
Creating bones, naming them, and moving attachments under them can be a tedious process. Spine provides a workflow to reduce the effort required.
Some image editor scripts, such as the script for Photoshop, can create bones so when the JSON data is imported into Spine, the bones are already there.
First create attachments to use as a reference for where to place bones. To create a bone, select a bone that will be the parent, then hold ctrl (cmd on Mac) and click or drag to select one or more attachments that you want on the new bone. Next, release ctrl and click or drag to create the new bone.
By following this process, the slots for the selected attachments are moved to the new bone and the new bone is named using the slot of the first attachment selected. This greatly reduces the time needed to setup a skeleton.
Compensation
Normally when a bone's transform is adjusted, any attachments and child bones are also affected. Compensation allows a bone to be adjusted without appearing to affect the attachments or child bones. For example, a bone can be moved or rotated without moving or rotating attachments or child bones. This is done by transforming the attachments or child bones an opposite amount. In animate mode, those attachments and child bones will need to be keyed.

Be sure to disable compensation when it is no longer needed to avoid confusion. The buttons flash orange when compensation is applied.
To move a bone without affecting its attachments, first enable image compensation (the Images button). This transforms attachments an opposite amount so they appear to not have changed. In animate mode, compensation is not supported for region attachments and changes bone compensation makes to mesh attachments need deform keys. Interpolation between keys may still cause the mesh vertices to move.
To move a bone without affecting child bones, first enable bone compensation (the Bones button). This transforms child bones an opposite amount so they appear to not have changed. In animate mode, the changes bone compensation makes to child bones need keys. Interpolation between keys may still cause the child bones to move.
When a bone has nonuniform scaling (meaning the X scale is not the same as the Y scale), due to how attachment positions are stored, image compensation may not be able to adjust attachments so they appear not to move.
Pixels
Region attachments might appear blurry if not positioned accurately, especially with pixel art. When the Pixels setting is enabled, region attachments snap to the nearest screen pixel. Consequently, the fractional parts of the translation values are limited to either .0 or .5, meaning any value after the decimal point is rounded to these increments.
Auto key

See auto key.
Viewport options
The viewport options panel provides convenient access to disabling selection, visibility, and name tags for bones and attachments.

The first column controls whether bones, region and mesh attachments, and other attachments can be selected. This can make some tasks easier by preventing accidental selection. Items can still be selected by clicking them in the tree.
The second column controls visibility of bones, region and mesh attachments, and other attachments. It is often useful to hide bones to reduce clutter while animating. When bones are hidden, they can still be selected and appear when under the mouse cursor.
The third column controls visibility of name tags for bones, region and mesh attachments, and other attachments. Name tags increase the amount of clutter for complex skeletons, but can make it much easier to find a specific bone or attachment. A name tag may be clicked to select the item.
Rulers
Guides will be added to the rulers in a future version of Spine.
Rulers can be shown by clicking the ruler button above the zoom slider in the viewport. A red line on each ruler alongside a numeric value show the mouse position for that axis, which can help with alignment. The ruler units are in world coordinates, which correspond to pixels for images that have not been scaled.
Copy/paste
Bone transforms, attachment transforms, and vertex positions can be copied by selecting them and pressing ctrl+C (cmd+C on Mac). The copied information can later be applied to the same or different bones, attachments, or vertices by selecting them and pressing ctrl+V (cmd+V on Mac) to paste.
When copying, both the world and local positions are stored. When pasting, either World or Local axes must be chosen to apply the world or local positions.
Bone transforms
Pasting bone transforms sets the bone rotation, translation, scale, and shear. The bone hierarchy is used when applying the copied bone transforms. This can be useful to make one limb match another, or to copy all or part of a pose from one animation frame to another.
Attachment transforms
Pasting attachment transforms sets the attachment rotation, translation, and scale. This can also be achieved by dragging an attachment and dropping it on another attachment in the tree.
Vertex positions
Pasting vertex positions works for meshes, paths, bounding boxes, and clipping attachments. Vertex positions can be pasted to a different attachment, as long as the same number of vertices is selected. Also, the order the vertices were selected before copying and before pasting should match the order you want the positions to be applied.
Video
Part 1:
Part 2: