Rigging new poses - Spine workflow tutorial
December 24th, 2020
Creating poses with different art during your animations is a great way to expand the range of what your characters are able to do in Spine. We gave a glimpse of this in our mesh binding tutorial and have talked about it in several of our streams, the latest demonstrating a complete turnaround of Helmet the dog. In this blog post we'll summarize the steps to add and manage multiple poses in your Spine skeleton.
You can download the files to follow along here. We've included all required images, as well as a Spine project for each step.

Preparing the assets

Let's imagine that you have already rigged a character and you want to add a new pose in the middle of an animation. The first step is creating the additional assets required for the new pose. You can use Spine's PSD export to create a reference for your work for Photoshop or other image editing software. This is especially useful to create new assets for an animation, such as a torso with a different perspective. The PSD export gives you layers for all the attachments of an entire mid-animation pose, so you can more easily draw new attachments.
Once you are happy with your new assets, you can export them from your image editing software using these scripts. Below we assume you are using Photoshop and our corresponding PhotoshopToSpine script.
By using the [slot] tag and names in your Photoshop project that match the existing slots in your skeleton, Spine can automatically import your new assets in the correct place. For our festive Spineboy, we've created additional assets in the Photoshop project that you can find in the folder 2-spineboy-alt-images/ in the materials download accompanying this blog post.

Importing the assets
The PhotoshopToSpine script generates a JSON file along with images that you can import into your existing Spine project.
To import the new assets, open the Spine project you wish to import the new assets into (in our case that's 1-festive-spineboy.spine inside the folder 1-festive-spineboy-start/). Next, choose Import Data or drag and drop the JSON file on the Spine window to open the Import Data dialog (in our case that's the file festive-spineboy-alt-hands.json in the folder 2-spineboy-alt-images).
Uncheck New project to import the files into the current skeleton, then choose Import into an existing skeleton and Ignore the existing attachments to retain the meshes that already exist.

After clicking Import, Spine will place the imported attachments matching an existing slot under that slot. Attachments not matching any existing slot will be placed in new slots under the root bone.
Adding the new pose assets in Spine
We are now ready to integrate the new assets into the rig so that they can be used in animations.

The first problem is that the positions of the new attachments likely don't match the bones already present in the skeleton. You may be tempted to work around this problem by creating a new set of bones for the new poses. This can work fine, but has the drawback of crowding the skeleton with many bones, turning your character into an unmanageable octopus, and making it harder to navigate and use your rig in the long run.
How to rig the new pose images
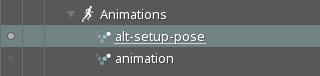
There is a better approach to integrate new parts! We can store a pose inside an animation that will act as an alternative setup pose. This animation then also serves as a convenient source to quickly copy a pose and paste it into a new animation. Let's call an animation used for this purpose a "setup pose animation".
To get started, in setup mode, make the new attachments for the new pose visible, turn them all into meshes, and use Edit Mesh to create the mesh structures. Remember to follow the mesh creation tips and try to keep the vertex count low!

While still in setup mode, bind the new meshes to a bone that doesn't move in any animation, such as the root bone.

After you're done with the above steps, hide the meshes for the new pose, thereby restoring your original setup pose.
You can uncheck export in the animation properties so that this animation won't be exported. It will still be available in the editor for you to use.
Now it's time to create the "setup pose animation" for our new pose. Switch to animate mode and create an animation that will be used to store the new pose.
If the new pose of a limb is in perspective, you can translate the bones to bring them closer or farther away. You can move a child bone along the parent axis to make this procedure more exact. Try to match the rotation of the bones the best you can.
Show all the meshes that are required by the new pose. Since all the meshes are bound to the root, the bones that are the real parents of these attachments can be moved freely, without affecting the attachments. Match the bones to the new positions of the meshes.
Once you are satisfied with the bone positions in this animation, bind each mesh to the respective bones that should influence it and unbind the root bone.
To test the weights, it's best to create a new animation for testing. You can test them using the setup pose animation and then undo, but it's easy to forget and accidentally ruin the pose. Duplicate the setup pose animation and adjust the weights. Once you're satisfied with the results, the pose is ready to use!
Using the new pose
- Press the spacebar to clear your selection. This will make all the dopesheet rows visible, making it easier to copy and paste in one click by selecting the keyframe from the first row.
- Offset the keys that show the attachments so that they are in the middle of the animation to make the change less harsh.
- Keep the images in separate slots and fade the new slots in if you'd like to create the illusion of a smoother transition with images that differ a bit more.
After setting everything up, making use of the pose is very easy: just copy all the keys from the setup pose animation to the new animation.
Adding new bones to be used in the new pose
As you add new parts to a pose, you may realize that you actually do need a new bone or two for better control. How can this be done when the pose is very different from the setup pose?
First, follow the procedure described in the last section to match the existing bones to the new meshes in the setup pose animation. Next, bind the meshes in the setup pose animation to the bone that will be the parent of the new bones, setting the weight to 100%.
Now switch to setup mode and make the new meshes visible. They may appear positioned strangely, but they are properly aligned with the bone that will be the parent of our new bones. Use the meshes as a reference to create the new bones. Once this is done you can hide the meshes again in the setup mode.
Switch to animate mode and in the setup pose animation bind the meshes to the newly created bones. Proceed by setting their weights in a test animation as described above.
Modifying a mesh in an alternative pose
What if the mesh structure can be improved and needs to be changed? This is easy in Spine version 4.0 and higher: you can simply use the Edit Mesh button in animate mode.
In earlier versions of Spine it's possible but a bit more difficult because Edit Mesh can only be used in setup mode. The mesh was bound for a pose in an animation and in setup mode it is likely distorted, making editing the mesh there difficult or impossible. It can be done, but it requires losing the mesh's weights. You can take note of the most important weight percentages or keep the vertices count low so that the weights are easier to recreate.
First weight all of the mesh vertices 100% to the root bone (or another bone that doesn't move). If you didn't unbind the root from the mesh, you can just set the weight to 100%, otherwise make sure to bind the root while in the setup pose animation so that the correct state of the mesh is stored when it is bound.
Go back to setup mode and activate the mesh, which now shows in its undistorted state in setup mode, then click Edit Mesh. Once your mesh modifications are complete, switch to animate mode, activate the setup pose animation and press update bindings to store the correct bone positions.
You can now edit the weights so that the mesh is influenced by the correct bones once again.
Video
If you're more of a visual learner, we've got you covered! Erika has streamed these techniques on Twitch. Check out the complete stream or the digest version here:
Conclusion
This is a powerful technique to master as it unlocks a huge variety of expressiveness for your characters. For it to work it's important to be careful and pay attention to where you are binding the bones and that the setup pose animation is treated as carefully as in setup mode. Since this is an advanced technique, it is easy to get lost trying to remember all the steps, so we hope this blog post comes in handy for you.
Have you tried out this workflow? Let us know what you've created! We love to see your creations, so remember to tag them using #madewithspine on social media!
Stop by the Spine forum and let us know your thoughts about these techniques or ask questions if you get stuck.